Deploying Applications

Table of Contents
- Deploying on 1 machine
- Deploying on a Local Area Network (LAN)
- Deploying on Amazon Web Services (AWS)
Deploying on Amazon Web Services (AWS)
Our deployment strategy entails an Initial set up: launching an AWS micro-instance as a client: It will send the jpregel Master jobs to perform. Once launched, you will stop the client when you are finished with a jpregel job. You never terminate the client instance. Instead, when you want to run another job, perhaps many days later, you begin by starting the client instance. The sequence of steps to run a job from your client is much shorter than the sequence to launch the client instance. We do endeavor to keep both of these instruction sequences as short as possible.
Initial set up
The initial set up of your AWS deployment environment consists of the following steps:
- Create a free GitHub account.
- Create a GitHub repository for jpregel-aws.
- Create an AWS account.
- Create a file with your AWS jpregel-aws access key.
- Launch an instance that serves as a jpregel-aws client.
We now explain how to perform these steps.
Create a free GitHub account
If you do not have a GitHub account, please create one. Rather than repeat the explanation here, please see the GitHub explanation for creating a free account.
-
Create a GitHub repository for jpregel-aws
Using your web browser, go to https://github.com/PeterCappello/jpregel-aws. Click the Fork button in the upper right part of the page. A screen fragment of the web page is given below.

You now have your own jpregel-aws repository.
-
Create an AWS account
Using your web browser, go to The latest AWS EC2 Getting Started Guide. You will see that getting started entails 4 steps.
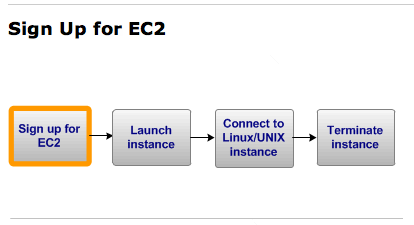
Here, we are interested in the first 2 steps:
- Sign up for EC2
- Launch instance
To sign up for EC2, create an AWS account:
- Go to http://aws.amazon.com, and click Create an AWS Account.
- Follow the on-screen instructions.
-
Create a file with your jpregel AWS access keys.
Running a jpregel job first entails instantiating a Master machine and a set of Worker machines. To do this, you need a jpregel access key. Here is how to create a file with this key.
- Sign in to your AWS account.
- In the upper right hand corner of the page, you will see your name. Click on it, which generates a drop-down menu.
- Click on the Security Credentials entry.
- On that page, click on the Access Credentials link.
- Under the Access Credentials section, click on Create a new Access Key.
-
Launch an instance
Now launch an instance that subsequently will serve as a jpregel-aws client.
- Go to Getting Started: Launch Instance instructions.
- Follow the on-screen instructions.
- Name the instance something meaningful, such as "jpregel client."
- Create a key pair, naming it "jpregel".
- Download the private part of the key pair and store it somewhere safe.
- For Launch Configuration, select the Amazon Linux, 64-bit option.
- Click Continue.
- Launch the instance, executing the following Unix commands:
- chmod 400 jpregel.pem (make sure your private key is not publicly viewable)
- ssh -i jpregel.pem ec2-user@publicDNS, where publicDNS is the public domain name of your instance.
- sudo yum install git
- git clone (url of your jpregel repository)
- ./deploy.sh
- scp -i jpregel.pem key.AWSkey
At this point you have a running jpregel client. Stop it, but do not terminate it.
When you want to deploy a jpregel job on EC2, you will start this client instance. Stop it when you are done. If you terminate it, you must create another instance using the steps above.
Start a jpregel application on AWS
- Start your EC2 instance.
- Using ssh, access a shell on the instance:
- git pull your jpregel-aws repository.
- Using ant, run your chosen jpregel client.
We now explain how to perform these steps.
Start your EC2 instance
- In EC2 console page, there is a Navigation column on the left. In that column, there is a heading called Instances. Under that heading, click Instances which takes you to a page that lists your instances.
- In the My Instances block of that page, check the instance that you want to start. Doing so, activates the Instance Actions drop down.
- Select start from the Instance Actions drop down. This will start the instance, which typically takes a few seconds.
Using ssh, access a shell on the instance
In the example below, "ec2-54-242-89-232.compute-1.amazonaws.com" is the public domain name of the machine being used as the client. The ssh command given below is issued from within the directory that has your jpregel.pem file.
ssh -i jpregel.pem \
ec2-user@ec2-54-242-89-232.compute-1.amazonaws.com
Using the shell:
change directory to your jpregel-aws directory
cd jpregel
git pull your jpregel-aws repository
git pull
Using ant, run your chosen jpregel client
We give an example ant command below
ant run -propertyfile \
nbproject/configs/ShortestPath.properties \
-Dapplication.args="foobucket 10 10 true true"